Windows11 VMware Workstation Pro安装 kvm
依赖环境
1.Windows11
2.VMware Workstation Pro

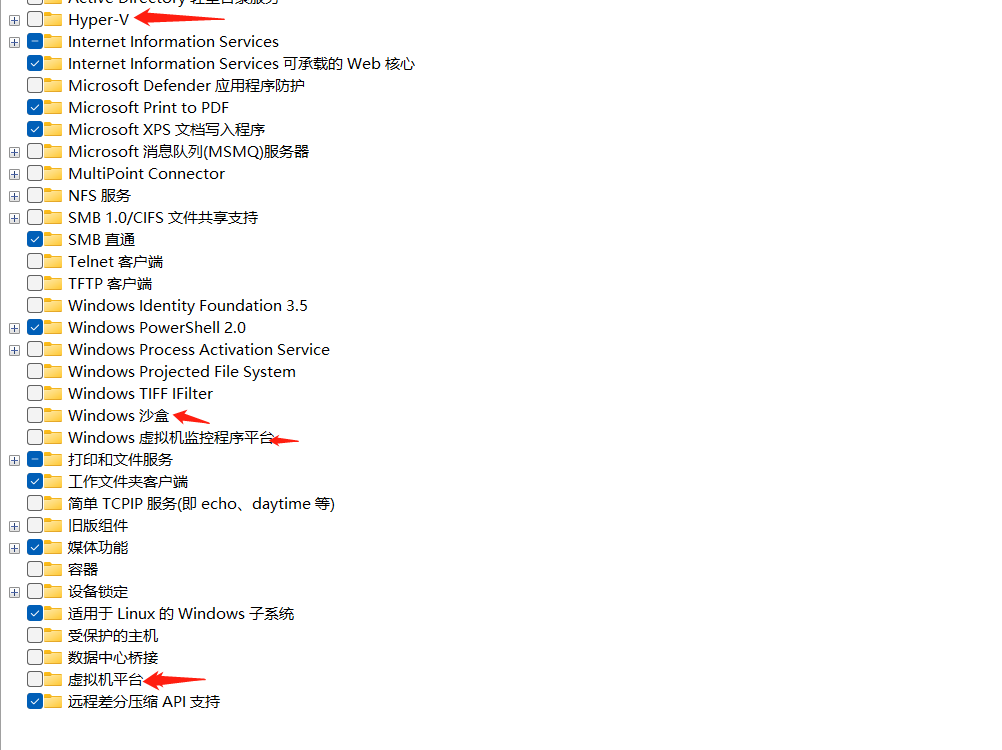
3.关闭windows虚拟化功能

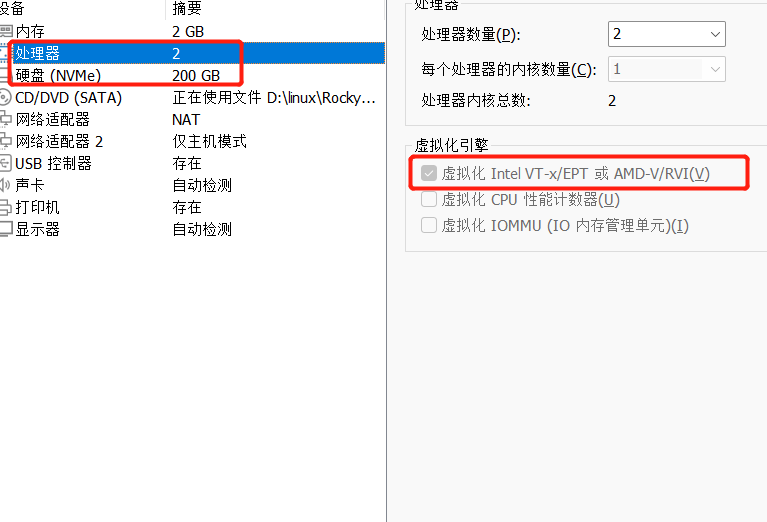
4.关闭内核隔离

5.开启CPU虚拟化

6.验证是否开启kvm
1
2
3
| lscpu
grep -E "vmx|svm" /proc/cpuinfo
lsmod |grep kvm
|


7.安装依赖工具
1
| yum -y install virt-manager virt-install virt-viewer libvirt
|
8.启动服务
1
| systemctl enable --now libvirtd
|
9.安装web管理工具
1
| yum -y install cockpit cockpit-machines
|
10.启动管理工具
1
| systemctl enable --now cockpit.socket
|

自签名证书
1
2
3
4
5
6
7
8
9
10
11
12
13
14
15
16
17
18
19
| #证书位置
/etc/cockpit/ws-certs.d
#查看自签名证书内容
openssl x509 -in ./0-self-signed-ca.pem -noot -text
#重新生成证书
#生成密钥 略
#生成请求生成证书 略
#生成服务器端证书
openssl x509 -req -in ./data/cockpit.csr -signkey ./data/cockpit.key -out ./data/cockpit.cert
|
11.命令行创建虚拟机
1
2
3
4
5
6
7
8
9
10
11
12
13
14
| #查询操作版本
osinfo-query os |grep -i centos
mkdir -p /home/vm/libvirt/images
qemu-img create -f qcow2 /home/vm/libvirt/images/centos7-2.qcow2 20G
virt-install --virt-type kvm --name centos7-1 --ram 1024 --vcpus 2 --cdrom=/home/vm/CentOS-7-x86_64-DVD-2009.iso --disk path=/home/vm/libvirt/images/centos7-2.qcow2 --network network=default --graphics vnc,listen=0.0.0.0 --noautoconsole --os-variant=centos7.0
|
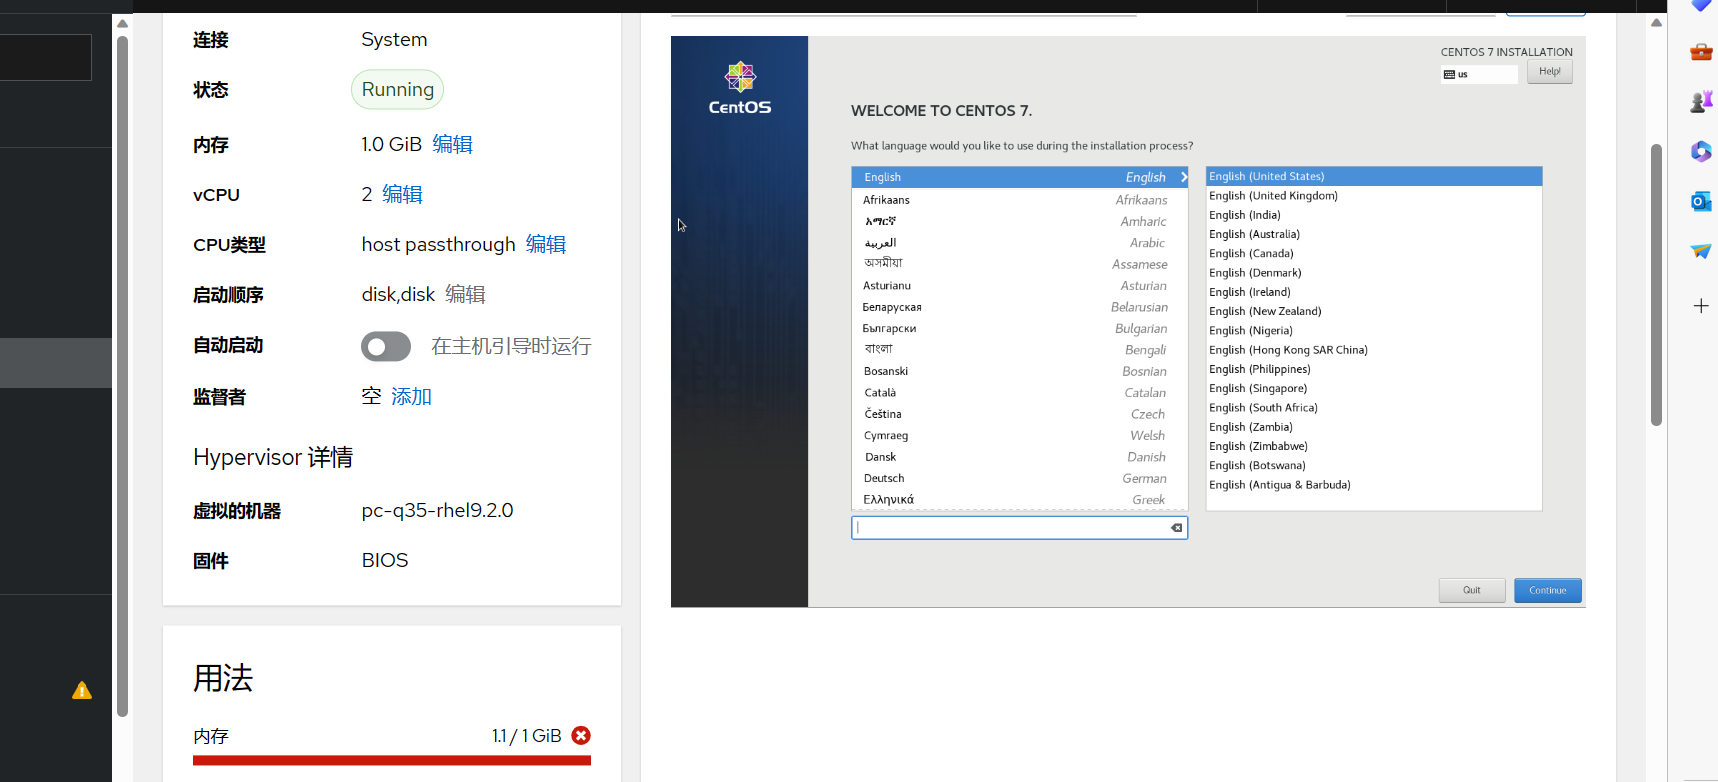
12.登录web管理完成安装


13.复制虚拟机
1
2
3
4
| cp centos7-2.qcow2 centos7-3.qcow2
virt-install --virt-type kvm --name centos7-3 --ram 2048 --vcpus 2 --disk bus=virtio,path=/home/vm/libvirt/images/centos7-3.qcow2 --network network=default,model=virtio --graphics vnc,listen=0.0.0.0 --noautoconsole --autostart --boot hd --os-variant=centos7.0
#复制后需要修改检查IP是否冲突
|
14.测试性能
15.常用命令
1
2
3
4
| virsh list --all
rpm -q dnsmasq #查看dhcp服务包
cat /var/lib/libvirt/dnsmasq/default.conf #dhcp默认配置文件
bridge link show #网桥信息
|
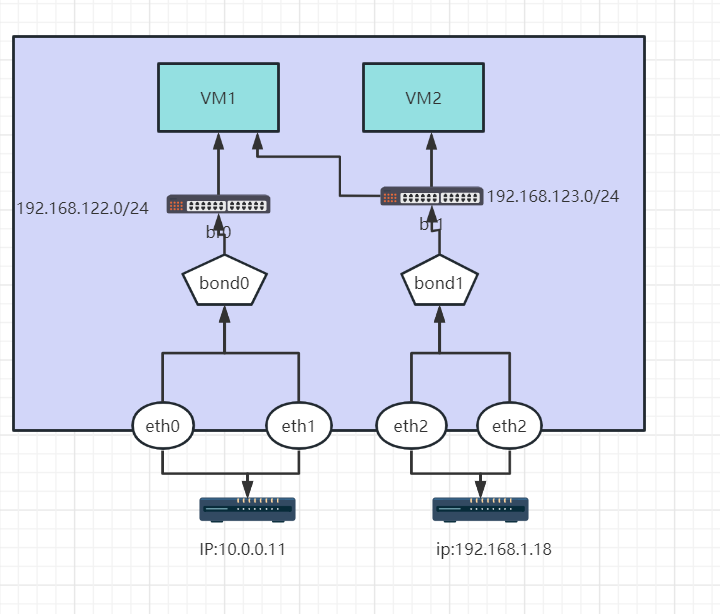
16.模拟外网和内网两个网段的虚拟机

绑定网卡,bond0绑定路由和dns地址,访问外网,bond1 访问内网
1
2
3
4
5
6
7
8
9
10
11
12
13
14
15
16
17
18
19
20
21
22
23
24
25
26
27
28
29
30
31
32
33
34
35
36
37
38
39
40
41
42
43
44
45
46
47
48
49
50
51
52
53
54
| vim /etc/sysconfig/network-scripts/ifcfg-bond0
NAME=bond0
TYPE=bond
DEVICE=bond0
BOOTRPOTO=none
IPADDR=10.0.0.11
GATEWAY=10.0.0.2
DNS1=8.8.8.8
PREFIX=24
BONDING_OPTS="mod-6 miimon=100"
vim /etc/sysconfig/network-scripts/ifcfg-eth0
DEVICE=eth0
NAME=eth0
BOOTRPOTO=none
MASTER=bond0
SLAVE=yes
ONBOOT=yes
vim /etc/sysconfig/network-scripts/ifcfg-eth1
DEVICE=eth1
NAME=eth1
BOOTRPOTO=none
MASTER=bond0
SLAVE=yes
ONBOOT=yes
vim /etc/sysconfig/network-scripts/ifcfg-bond1
NAME=bond1
TYPE=bond
DEVICE=bond1
BOOTRPOTO=none
IPADDR=172.168.10.11
PREFIX=24
BONDING_OPTS="mod-6 miimon=100"
vim /etc/sysconfig/network-scripts/ifcfg-eth2
DEVICE=eth2
NAME=eth2
BOOTRPOTO=none
MASTER=bond1
SLAVE=yes
ONBOOT=yes
vim /etc/sysconfig/network-scripts/ifcfg-eth3
DEVICE=eth3
NAME=eth3
BOOTRPOTO=none
MASTER=bond1
SLAVE=yes
ONBOOT=yes
|
测试
1
2
3
| cat /proc/net/bonding/bond0 #查看网卡绑定状态
watch -n1 ifconfig -s bond0
ifconfig -s bond0 | column -t
|
16.添加网桥 模拟仅主机模式
1
2
3
4
5
6
7
8
9
10
| yum -y install bridge-utils
vim /etc/sysconfig/network-scripts/ifcfg-br0
DEVICE=br0
NAME=br0
STP=yes
BOOTRPOTO=static
TYPE=Bridge
IPADDR=192.168.123.1
PREFIX=24
|
17当前虚拟机更换网络模式
1
2
3
4
| virsh list --all #列出所有主机
brctl show #查看当前虚拟机网络
ip link show master virbr0 #查看默认网卡网络
bridge link show #查看所有桥接网卡信息已经对应网桥
|
web管理界面修改网络模式
1
2
3
4
5
6
7
8
9
10
11
12
13
14
15
16
17
18
19
20
21
22
| #虚拟机配置文件路径/etc/libvirt/qemu
<interface type='network'>
<mac address='52:54:00:30:eb:34'/>
<source network='default'/>
<model type='virtio'/>
<address type='pci' domain='0x0000' bus='0x01' slot='0x00' function='0x0'/>
</interface>
<interface type='bridge'>
<mac address='52:54:00:e7:b3:20'/>
<source bridge='br0'/>
<model type='virtio'/>
<address type='pci' domain='0x0000' bus='0x07' slot='0x00' function='0x0'/>
</interface>
<interface type='bridge'>
<mac address='52:54:00:92:c5:fc'/>
<source bridge='br0'/>
<model type='virtio'/>
<address type='pci' domain='0x0000' bus='0x01' slot='0x00' function='0x0'/>
</interface>
|
vm3访问外网测试

1
| virsh domiflist centos7-1
|
vm4访问vm3测试

外网访问vm3 80端口
1
| iptables -t nat -A PREROUTING -d 10.0.0.11 -p tcp --dport 80 -j DNAT --to-destination 192.168.122.3:80
|


